Exciting News!

I am very happy to let you know that Cook AZ I Do has a new location Cookazido.com.  We have been working for some time now to transition to the new location.  Please pardon our dust as we work out any bugs that might occur.  In the meantime, if you would click on the link in the e-mail you have been sent in order to subscribe to the new location, I would really appreciate it.  I have loved the relationships I’ve developed with all of you, and want to keep hanging out with you!  You can also click on the link above to go straight to the site , and click on the Follow button.  Thanks so much for being part of the Cook AZ I Do community.  I look forward to seeing you at the new location! 🙂

Posted in Uncategorized | 8 Comments

Skillet Peach Cobbler

Skillet Peach Cobbler

We invited friends to our cabin last weekend, and I wanted to make something special for dessert while they were there.  I love using mini cast iron skillets (I found mine at Cost Plus World Market) for all kinds of things at the cabin from appetizers to breakfast, but this time I thought it would be fun to use them to make individual peach cobblers.  They turned out so well, I thought I would share the recipe.

Skillet Peach Cobbler

This is a classic peach cobbler with very basic ingredients so the flavor of the peaches really shines through.  The best part about it is the crumble on top.  It is absolutely delicious!  It has brown sugar for richness, and just a bit of cinnamon for flavor, as well as vanilla.  It is the best crumble recipe I have found.  If you don’t have mini skillets, you can just use 6-inch ramekins or 1 large cast iron skillet and adjust the baking time accordingly.  This makes enough for 4 individual servings, but it is quite a lot for one person so I hand out 1 pan for every 2 people and 2 spoons.  It’s more fun that way anyway!  I have tried every way I know how to get ice cream up to our cabin without melting, because it almost seems like a crime to serve a cobbler without some ice cream on top.   As you can see, though, it is pretty remote, and so far I haven’t been successful, even with dry ice.  If you have any ideas about that, be sure to let me know.  I took a can of whipped cream, and we enjoyed that instead, but ice cream would have been a lot better!

Skillet Peach Cobbler

Some time I will have to write a post and show you some pictures of the cabin and the area around there.  It is such an amazing place.  But in the meantime, I couldn’t resist showing a picture of the sunset last weekend.  Every night it was like a show, just looking out at the sky and seeing what it was going to be like that evening.  Arizona may not have the seasons that other states do, but we definitely make up for it in sunsets!

Sunset at the Cabin

I hope you enjoy this cobbler as much as we did if you are still able to get peaches where you are.  I think that may be the last peach dessert we have for a while, but there is always next year.  In the meantime, I think I am finally ready to embrace fall (or the hope of fall in the near future – everything is a little later here).  And we are all definitely ready for some cooler weather!

Skillet Peach Cobbler

Skillet Peach Cobbler

  • Servings: 4 (6-inch) cast iron skillets or ramekins
  • Difficulty: easy
  • Print

For the Peaches:

  • 8 firm, ripe peaches
  • 1 Tbsp. fresh lemon juice
  • 1/2 c granulated sugar
  • 1/4 c all-purpose flour
  • 1 pinch salt

For the Crumble Topping:

  • 2 c all-purpose flour
  • 2/3 c granulated sugar
  • 1/2 c packed light-brown
  • 3/4 to 1 tsp. salt
  • 1/2 tsp. ground cinnamon
  • 12 Tbsp. butter, cold and diced into cubes
  • 2 tsp. vanilla extract
  1. Preheat oven to 350 degrees.
  2. Peal peaches and remove seeds.
  3. Slice each peach in half, and each half in 4 slices.
  4. Place peaches in a large bowl.
  5. Add lemon juice, sugar, flour, and salt.  Stir gently to combine.  Set aside.
  6. Prepare crumble topping by combining ingredients and mixing with your hands until all ingredients are evenly distributed.
  7. Divide peaches equally among 4 mini (6-inch) cast iron skillets or ramekins.
  8. Pour equal amount of crumble topping over the peaches in each skillet.
  9. Place skillets in oven and bake for 20-30 minutes (mine took 30 but I was at a higher altitude when I baked them) until browned and bubbly.
  10. Serve warm with ice cream if desired.
  11. Refrigerate any leftovers.

Recipe from Cook AZ I Do, adapted from a recipe by Cooking Classy


Posted in Cabin Recipes, Cast Iron Skillet Recipes, Company, Desserts, Recipes, Summer Recipes | Tagged , , , , , , , | 23 Comments

Perfect Guacamole

Guacamole

I realized recently that I don’t have a recipe on Cook AZ I Do for guacamole.  Considering how much our family likes guacamole, that just is not acceptable.  I think the reason I haven’t put it on here is most of the time with guacamole I just wing it.  I also have liked it pretty plain in the past so that the avocado is the star, but recently I’ve had some chunky guacamole at restaurants and really enjoyed it.  So I decided to figure out how to make it, and get the recipe  down so I could repeat it.  This recipe is the perfect guacamole to me.  It is kind of a cross between chunky and smooth with tons of flavor.  The avocados still shine, but there is some other tasty stuff going on in this bowl, too!

Guacamole

This guacamole would be perfect for company as it is a little spicy, but not a lot.  If you like it more spicy, you can always add one more jalapeno.  If you like it a little more chunky, add another 1/4 cup tomatoes and 1/4 cup onions.  Just don’t eliminate the lemon juice, as it keeps the avocados from turning brown. Guacamole is really easy to adjust to your preferences.

Guacamole

My husband never really ate guacamole until I made this version.  He ate quite a bit of this and even told me it was good.  After I picked myself up off of the floor, I decided this one was a keeper!  Summer is still going strong here in Arizona, and since it isn’t Labor Day yet, I think there is still time for more guacamole.  Of course, there really isn’t any season that I know of that isn’t appropriate for Mexican food!  I hope you have a great Labor Day Weekend everyone!

Guacamole


Guacamole

  • Servings: 6
  • Difficulty: easy
  • Print

  • 3 ripe avocados
  • 2 tsp. fresh lemon juice
  • 1 tsp. salt
  • 1/2 tsp. pepper
  • 1/4 c onion, diced small
  • 1/4 c tomato, diced small
  • 2 Tbsp. chopped fresh cilantro
  • 1 jalapeno, diced small without seeds and membranes
  1. In a large bowl, with a fork, mash together avocados, lemon juice, salt, and pepper.
  2. Add remaining ingredients.  Stir to combine.
  3. Serve immediately.  Does not freeze or store well in refrigerator so eat it all up! 🙂

Recipe from Cook AZ I Do, adapted from a recipe by She Wears Many Hats 


Posted in Appetizers, Cabin Recipes, Cinco de Mayo, Company, Family Favorites, Mexican, Party Recipes, Recipes, Summer Recipes | Tagged , , , , | 31 Comments

Let Her Eat Cake – Vanilla Bean Cake With Pink Champagne Buttercream

Our daughter is turning 21 this weekend!  I don’t know how that could be because I swear it was only yesterday she was born.

Jessica Kelley

I wanted to make her a special cake for such a significant birthday so decided on an ombre rose cake.  From the minute I saw it, I knew it was the perfect cake for her.  She has always been all about pink and ruffles and frilly things.  I also thought it would be fun to use champagne frosting for such a special occasion.

This cake was so much fun to make and actually not that difficult.  It was a bit of a labor of love due to time, but that is perfect, because we love her a lot!  And it was a lot easier than the other kind of labor that brought her into this world! 🙂 I used my Vanilla Bean Cupcake Recipe (a couple of box mixes would work fine too) and frosted the whole thing with a crumb coat of Champagne Buttercream going a little heavier with the frosting between the layers.

Just make sure you pick out a champagne that you like the taste of and is on the sweeter side.   Due to boiling the champagne to concentrate the flavors, the frosting ends up tasting like the undertones of the champagne.  I used a pink champagne that had undertones of berry flavor, so when added to the frosting, it gave a bit of a tart/sweet berry flavor to it.  This frosting worked out great because it made enough to cover the whole cake, and in between the layers, and was so fluffy and spreadable.  I can’t wait to try it again sometime, and experiment with other champagnes.

_MG_8443croppedagain

The roses are made out of Perfect Crusting Buttercream.  I normally hate to use a recipe that calls for shortening, but I was worried that in the Arizona heat, the roses would just melt right off of the cake and slide down the sides.

It tastes more like the kind of frosting you would get on a store-bought cake.  The roses are not real roses, but just basically piping a swirl counterclockwise.  You start at the center point, and swirl around that point counterclockwise a couple of times ending at the top.  You really don’t even have to be that neat about it, as the next rose will cover the ending point of the rose beneath it.

Then start your next rose about 3/4 of an inch from the edge of the last rose.   I Am Baker, the one who first made this type of cake, has a great tutorial on her site that really helped me.

You can see I didn’t quite leave enough room for some of the roses on the last row.  But once you get everything done, it really doesn’t matter.  You don’t notice each individual rose as much.  It is the overall effect you are going for.  Or at least that is what I told myself!

I think you  could use this recipe for so many special occasions.  All you have to do is swap out the colors depending on the event. You could even use the Champagne Buttercream to frost cupcakes.  I hope Jessica likes her cake.  I wanted her to know how special she is to us, and commemorate her becoming an adult.  Being that she is our youngest, it really seems strange that she could already be 21.  Especially when every time I look at her, this is what I see, and I always will.

1999 03 19 jessica w flower (2)autocorrectcropped

Happy Birthday, Jessica!

Vanilla Bean Cake With Champagne Buttercream

  • Servings: 8-10
  • Difficulty: moderate due to time
  • Print

  • 2 batches of Vanilla Bean Cupcake recipe (click on link) or 2 boxed cake mixes split evenly into 3 (8-inch) cake pans
  • 1 recipe Champagne Buttercream (see below)
  • 1 recipe Perfect Crusting Vanilla Buttercream (see below)

For the  Pink Champagne Buttercream:

  • 1 c butter, softened
  • 1/2 c shortening
  • 6 c powdered sugar, sifted
  • 1 c sweet pink champagne (I used Korbel Sweet Rose – use one you like the taste of)
  • 3 tsp. clear vanilla extract
  • 1-3 tsp. heavy whipping cream (I used 3)
  • red food coloring (optional)
  1. Place 1 c of pink champagne in a small saucepan over medium-high heat.  Simmer until reduced to about 1/4 of a cup.  Transfer to a small bowl or cup and allow to cool completely.  Reducing the champagne down will enhance the flavors.
  2. Beat butter and shortening in bowl of stand mixer with paddle attachment on medium-high speed until light and fluffy, about 3 minutes.
  3. Add vanilla and food coloring if desired and beat to incorporate.
  4. With mixer on low, slowly add in powdered sugar 1 cup at a time, beating until well-blended after each addition, frequently scraping sides and bottom of bowl.
  5. Add cream, salt, and reduced champagne.
  6. Once incorporated, whip frosting for at least 3-5 minutes on medium-high to  high until light and fluffy.
  7. If frosting is too thick to spread, gradually beat in additional cream or champagne (reduced or not) until you reach the desired consistency.

Recipe from Cook AZ I Do, slightly adapted from Tidymom

For the Perfect Crusting Buttercream:

  • 1 (2 lb.) bag powdered sugar, sifted
  • 1 c shortening (Crisco recommended)
  • 3 tsp. vanilla extract (use clear if want white frosting)
  • 1/2 c to 3/4 c whole milk
  • pink food coloring (I used Wilton Pink)
  1. Cream shortening and vanilla in mixer for 2-4 minutes.
  2. Add in powdered sugar, one cup at a time.  If you find your mixer struggling, slowly add in milk.  Use more milk for a creamy consistency, use less milk for a stiff consistency.

To Assemble Cake:

  1. Level 2 of the 3 cake layers so they are flat with a serrated, long sharp knife.
  2. Place first layer on plate.  Frost with Champagne Buttercream using a thin coat on the sides, and about a 1/4 inch layer of frosting in between layers and a 1/2 inch layer on top.
  3. Place about 1/4 of the amount of Crusting Buttercream in a bowl, and tint with Wilton Pink Food Coloring.  Place in a piping bag with a medium size star tip (844).  Pipe roses around the first row closest to the plate by starting in the center of the rose, and swirling first left, then counterclockwise twice.  Make sure the size of your roses is the size of each layer.
  4. After finishing the first layer of roses, place another 1/4 cup of Crusting Buttercream in a bowl, and add a slightly lesser amount of food coloring than in the first bowl.  Place in clean piping bag with a medium star tip (844), and pipe roses above each rose in the first row.
  5. After finishing the second layer of roses, place the rest of the white frosting in a clean piping bag with a medium star tip, and pipe roses above the roses in the second row.
  6. Fill in the top of the cake with more white roses.
  7. Let sit in the freezer about an hour, then wrap the cake with plastic wrap.  Store in the refrigerator or freezer until ready to serve.  Be sure to allow enough time for the cake to defrost in the freezer or soften if in the refrigerator before serving.
  8. Refrigerate any leftovers.

Recipe from Cook AZ I Do, originally from I Am Baker


Posted in Cakes, Cupcakes, Mother's Day, Party Recipes, Recipes, Wedding Reception Recipes | Tagged , , , , , , , | 42 Comments

The Magic of Cream Puffs

Cream Puffs

In our family, we have had some lofty goals as far as what we wanted to be when we grew up.  My sister wanted to be an Avon lady, and my daughter wanted to be a pink kitty. When I was young, I set my sights on being a magician.  The reason I wanted to be a magician was because I couldn’t stand it that I didn’t know how they did their tricks.  I figured if I became one of them, I would find out how they sawed people in half, pulled rabbits out of people’s ears, etc.  I never quite reached my goal until this week.  Making these cream puffs made me feel like a magician!  You place this blob of dough onto a baking sheet, and 25 minutes later, you have a beautiful pastry that is hollow inside, just waiting to be filled with all kinds of yummy things.  And thanks to Google, you can also find out why this works (it has to do with the liquid vaporizing and the steam stretching the dough before it solidifies).  The amazing part is that they are so simple, so easy, and so quick to make.  You probably have all the ingredients in your pantry right now to make them!

Cream Puffs

My grandma used to make cream puffs.  My mom has my grandma’s recipe, and she and I have talked about trying to make them for years, but for some reason we got the impression that they were really difficult, so we never did.  Then I saw a recipe for cream puffs on Whisked Away, and Jamie talked about how easy it was.  I thought it must be a different recipe, but her post gave me courage to try it.  I am so glad I did.  I had them made and in the oven in 10 minutes.  It wasn’t difficult at all.  And then I looked at my grandma’s recipe, and it was almost the exact same one.  So I’m not sure why we were under the impression they were hard.  I have made them twice now, and they turned out both times.  You don’t even need a mixer.  All you have to do is boil water and butter together, and whisk in flour, sugar, vanilla, and eggs.  It turns into a big gloopy mess, but that is normal.  I couldn’t believe that this was going to turn into cream puffs!

Cream Puffs

After that, scoop balls of dough onto a cookie sheet.

Cream Puffs

Bake for about 25-30 minutes, and abracadabra, you have tiny little hot air balloons,

Cream Puffs

just waiting to be filled!

Cream Puffs

I kept thinking of all kinds of things that would be good as filling, but this time I just used sweetened whipped cream.

Cream Puffs

They were so good!  You can also drizzle chocolate ganache over the top if you want to make them even more decadent.

Cream Puffs

Either way, you are absolutely going to love these.  Bake them for your family, or friends, and prepare for them to be amazed!  We’ll just keep it between us how easy they are to make.  After all, we magicians can’t give away our secrets! 🙂

Cream Puffs

  • Servings: approximately 12 depending on the size of your scoop
  • Difficulty: easy
  • Print

For the Cream Puffs:

  • 1/2 c butter (1 stick)
  • 1 c water
  • 1 c flour
  • 1 Tbsp. sugar
  • 1/2 tsp. vanilla
  • 4 eggs
  1. Preheat oven to 400 degrees.
  2. In a medium saucepan over medium-high heat, heat water and butter until it begins to boil.
  3. Without removing from the heat, gradually add flour and whisk until smooth.  Remove from heat.
  4. Whisk in sugar and vanilla.
  5. Add eggs in one at a time, whisking well after each egg before adding the next.
  6. Line a large cookie sheet with parchment paper.
  7. Use a 1 or 2 Tbsp. scoop, depending on the size puffs you want, to scoop out a ball of dough and place at least one inch apart.
  8. Bake for 25-30 minutes, depending on size of scoops, until puffed and lightly browned.
  9. Transfer to a cooling rack and split along the side to release any moisture.
  10. When they are completely cooled, cut off the top third of the cream puff.
  11. Fill with sweetened whipped cream.
  12. Place top back on, and drizzle with cooled ganache, if desired.

For the Sweetened Whipped Cream:

  • 1 quart whipping cream
  • 1/2 c sugar
  • 1 tsp. vanilla
  1. Place wire attachment on stand mixer.
  2. Pour whipping cream into bowl of stand mixer (to make it whip up faster, chill bowl ahead of time).  Whip at high-speed until cream is thick and holds peaks.
  3. Add sugar and vanilla, and mix until incorporated.
  4. Use a piping bag or spoon to fill cream puffs.

For the Chocolate Ganache Drizzle:

  • 12 oz. chocolate chips (use good quality, Ghiradelli recommended)
  • 1 c whipping cream
  1. Place chocolate chips in heat proof bowl.
  2. Heat whipping cream in medium saucepan on medium heat, stirring constantly until very hot, and at boiling point.
  3. Pour over chocolate chips.  Let sit 10 minutes.
  4. Stir until mixed and glossy.
  5. Let cool and then place in a piping bag or baggy, and drizzle over cream puffs.

Recipe from Cook AZ I Do, originally found on Whisked Away 


Posted in Company, Desserts, Family Favorites, Recipes, Valentine's Day | Tagged , , , , , , , | 20 Comments

Caprese Salad with Sweet and Tangy Balsamic Vinaigrette or Summer on a Plate

Caprese Salad With Sweet and Tangy Balsamic Vinaigrette

I have a new morning smoothy.  It is called Sweet and Tangy Balsamic Vinaigrette.  Not really.  But I did have salad for breakfast this morning because I couldn’t wait until lunch to have more of this dressing.  It is so good.  I really did want to drink it.  But I refrained, I just drizzled it over this Caprese Salad.  Okay, I may have slathered the salad with dressing.  But I went running this morning.  And that, in my opinion, means I can be a little heavy-handed with my breakfast dressing.  Actually running in the morning may be a bad thing, as now I can justify almost anything I put in my mouth during the day.  Somehow I think this defeats the purpose of exercising.  But I don’t want to be quick to jump to conclusions.

Caprese Salad With Sweet and Tangy Balsamic Vinaigrette

This salad is the perfect vehicle for the Sweet and Tangy Balsamic Vinaigrette.  Traditionally, Caprese Salad consists of slices of tomatoes, mozzarella, and fresh basil alternately layered together and drizzled with olive oil. Instead, in this salad, tiny little mozzarella balls are paired with sweet cherry tomatoes on a bed of baby greens and arugula. The cheese immediately absorbs the vinaigrette, and between the fresh garden flavor of the basil leaves, and the sweet tomatoes, it is one of the best salads I have ever eaten.  It is definitely a new favorite.

Caprese Salad With Sweet and Tangy Balsamic Vinaigrette

It is so simple to make, too.  You just place the 2 kinds of lettuce on the plate, slice the cheese and tomatoes in half, place on top of the greens, and mix up the dressing.  When ready to serve, chop up your fresh basil (it gets kind of black around the edges if you chop it up too far ahead of time), and drizzle the vinaigrette over all, ending with a sprinkling of freshly ground pepper.

Caprese Salad With Sweet and Tangy Balsamic Vinaigrette

We ate this with spaghetti, but it would also go great with the pizza I posted last week. The taste really is like summer on a plate.  And since summer doesn’t end in Arizona for another 2 months, all the more time to enjoy this fresh tasting breakfast smoothie, I mean salad. 🙂

Caprese Salad With Sweet and Tangy Balsamic Vinaigrette

Caprese Salad With Sweet and Tangy Balsamic Vinaigrette

  • Servings: 6-8
  • Difficulty: easy
  • Print

For the Salad:

  • 1/2 of a 5 oz. bag of baby lettuce
  • 1/4 of a 7 oz. bag of arugula
  • 1 lb. grape tomatoes, sliced in half
  • 1 lb. Ciliegine (cherry-sized mozzarella balls)
  • 12 large fresh basil leaves, sliced in thin strips
  • freshly ground pepper
  • Sweet and Tangy Balsamic Vinaigrette (see below)
  1. Drain Ciliegine and let them dry for a minute on a paper towel.
  2. Wash grape tomatoes.
  3. Slice cheese and tomatoes in half.
  4. Layer both kinds of lettuces on a large plate.
  5. Alternately arrange cheese and tomatoes in rows on top of the lettuce.
  6. Cover and place in refrigerator until ready to serve.
  7. Make dressing, cover, and place in refrigerator.
  8. When ready to serve, slice basil, and sprinkle over salad.
  9. Drizzle dressing over everything, and top with ground black pepper.
  10. Keep leftovers in the refrigerator.

For the Dressing:

  • 3 cloves garlic, minced
  • 4 Tbsp. Dijon mustard
  • 3/4 c balsamic vinegar
  • 1 1/4 c plus 1 Tbsp. olive oil
  • 3 Tbsp. sugar
  • 1 tsp. salt
  • 1/4 – 1/2 tsp. pepper
  1. Mince garlic and place in large mason jar.
  2. Add all other ingredients.
  3. Place lid on jar, and shake until smooth and blended.
  4. Keep in refrigerator until ready to use. (This makes quite a bit of dressing, but I like to keep the rest for salads during the week.)

Recipe from Cook AZ I Do, adapted from Lauren’s Latest 


Posted in Company, Italian, Recipes, Salads, Side Dishes, Summer Recipes | Tagged , , , , , , , | 25 Comments

Best Ever Homemade Pizza Sauce and Copycat Pizza Hut Supreme Pizza

Supreme Pizza

Jeff and I have date night every Tuesday night.  We don’t really make a big production out of it.  Most of the time, Jeff will bring home a bottle of wine,  we eat dinner together, and watch our favorite T.V. show.  I try to make something Jeff enjoys for dinner, light candles, turn on some favorite music while we eat, and make a point of eating at the table so we can talk without distractions.  It gives us a chance to focus on each other for a little while. We both look forward to it.  Sometimes I will make pizza because I know he really likes it, and it goes great with wine.  I am kind of picky about pizza.  I love Pizza Hut because the sauce is so flavorful.  This sauce is very similar to Pizza Hut’s sauce.  It is thick, and rich, and

Supreme Pizza

full of flavor due to all of the seasonings, onion, and garlic.

Supreme Pizza

You can have a batch made up in about 30 minutes, and then all you have to do is roll out your pizza dough and spread it on.

Supreme Pizza

Then start adding the toppings.  We both like the Supreme Pizza from Pizza Hut which includes bell pepper,

Supreme Pizza

sausage,

Supreme Pizza

mushrooms,

Supreme Pizza

onions,

Supreme Pizza

olives,

Supreme Pizza

and cheese.

Supreme Pizza

Then just put it in the oven for about 20 minutes, and you have a mouth-watering, amazing pizza perfect for date night, family game night, or any time you are craving pizza.

Supreme Pizza

I recently heard a story about a couple who felt like they were doing pretty well in their marriage.  They had been having date night once a week, but decided to stop it as their life was so busy.  After a year without date night, things between them had fallen apart, so they decided maybe their date nights were why they had a good marriage.  They then decided to have 2 date nights a week!  I think 2 might be pushing it a little for us, but one night a week has worked out really well.  I don’t know if that has contributed to our marriage, but why take a chance and mess with a good thing?  Especially if it involves pizza! 🙂

Supreme Pizza

Homemade Pizza Sauce and Supreme Pizza

  • Servings: enough sauce for 2 large pizzas
  • Difficulty: easy
  • Print

For the Sauce:

  • 3 Tbsp. olive oil
  • 1 large onion, chopped
  • 3-5 cloves garlic, minced
  • 1 (28 oz.) can tomatoes, undrained, and chopped
  • 1 (6 oz.) can tomato paste
  • 1 Tbsp. crushed oregano leaves
  • 1 tsp. basil
  • 1 bay leaf
  • 1 Tbsp. honey
  • 1 tsp. salt
  • 1/4 tsp. pepper
  1. Heat oil in a large pan over medium heat.
  2. Add chopped onions and saute until limp.
  3. Reduce heat to medium low, and add minced garlic.  Cook, stirring often, until garlic is cooked, about 5 minutes.  Watch carefully so garlic doesn’t brown.
  4. Add remaining ingredients.  Bring to a boil, lower heat, and simmer uncovered for 15 – 20 minutes until liquid is reduced a little.
  5. Remove bay leaf.
  6. Set aside until ready to use.

For the Supreme Pizza:

  • 1 pizza crust, homemade or store-bought (Trader Joe’s has good pizza dough)
  • 1 batch of homemade pizza sauce
  • 1 bell pepper, thinly sliced
  • 1 pound hot or regular pork Italian sausage, cooked
  • 1 purple or yellow onion, thinly sliced
  • 8 oz. mushrooms, thinly sliced
  • 1 jar Kalamata olives or 1 can black olives sliced in half
  • 8 oz. mozzarella cheese, grated
  1. Preheat oven according to recipe or package directions.
  2. Sprinkle flour over flat surface, and roll out pizza dough to desired thickness.
  3. Place dough on large cookie sheet or pizza pan.
  4. Spread sauce over dough leaving a half-inch border around the edges.
  5. Layer bell pepper, sausage, onion, mushrooms, and olives on top of sauce.
  6. Sprinkle cheese over all.
  7. Bake according to recipe or package directions.  (I used a piece of foil tented over pizza until last 10 minutes so cheese wouldn’t burn.)
  8. Let sit for 5 minutes, then slice into pieces, and serve immediately.

Recipe from Cook AZ I Do, obtained originally from my friend Betsy Duzan

Supreme Pizza


Posted in Company, Family Favorites, Italian, Main Dish, Party Recipes, Recipes | Tagged , , , , , , , | 23 Comments

Perfect Pancakes

I am so relieved to post this recipe for these pancakes today.  You see, I have a completely irrational fear that I am going to lose this recipe.  And that would be terrible.  Because this is the best recipe for pancakes that I have ever tasted.  I used to think I didn’t like pancakes.  I had tried box mixes to make them, and I had tried to make them from scratch. They always tasted like cardboard to me.  Even with lots of butter and syrup, they were just boring.  And then my husband and I visited my Aunt Marlene and Uncle Don.  My aunt made us pancakes.  I still remember the moment in time when I took that first bite. It was like the heavens opened and angels began to sing!  It was a revelation.  I do like pancakes!   I just don’t like boring, tasteless pancakes that taste like cardboard.

Perfect Pancakes

I have made these so many times since then.  They are one of my favorite things to make at the cabin when we have a lot of people staying with us because it makes a lot of them, and it seems like people like them as much as I do.  I usually serve them with bacon or sausage and fresh fruit.  It’s really important to use real butter and real syrup with these.  That sends them completely over the top.  I melt the butter, too.  There is nothing worse than pancakes with butter on them that won’t melt because the pancakes have cooled off a little bit.  😦  I also warm the syrup.  It just makes for a better pancake experience and if you are going to go to the trouble of making pancakes, why not go all out?

Perfect Pancakes

I think the reason these pancakes turn out so well is because a of reaction between the buttermilk and the baking powder.  The recipe calls for you to not combine the wet ingredients with the dry ingredients until the last-minute.  When you do, the mixture seems to gurgle and bubble a little bit.  The result is a light, fluffy pancake with tiny air pockets through out.  It is also important to grease your griddle heavily with canola or vegetable oil.  First of all it helps them not stick, but in addition it helps them taste better.  Maybe because they get that slightly crispy outer edge and helps them brown better.  Just trust me.  It’s a good thing!  They are called Perfect Pancakes.  Not diet pancakes.  Save them for special occasions and all will be well.

Perfect Pancakes

I don’t know if I have ever told my aunt how much I love her pancake recipe and how grateful I am that she made them for us that day.  That is another reason for wanting to get this recipe on the blog, because I wanted to let her know how much I appreciate it.  We share a love of cooking, and in the past when she visited, we picked out some new recipes that we wanted to make together and then spent the day in the kitchen cooking and talking.  That is one of my favorite memories.  So thank you, Marlene, for being a wonderful aunt, and sharing your love of cooking and recipes with me.  And thanks for helping me to discover that I do like pancakes after all!

Marlene and Shari

Perfect Pancakes

  • Servings: about 12 medium sized pancakes
  • Difficulty: easy
  • Print

  • 3 c all purpose flour
  • 3 Tbsp. granulated sugar
  • 3 tsp. baking powder
  • 1 1/2 tsp. baking soda
  • 3/4 tsp. salt
  • 3 c real buttermilk (don’t substitute anything else)
  • 1/2 c milk
  • 3 eggs
  • 1/3 c butter, melted
  • extra butter for the top of pancakes
  • syrup
  • canola oil for the griddle
  1. In a large bowl, combine flour, sugar, baking powder, baking soda, and salt.  Whisk to mix.  Set aside.
  2. In a separate bowl, beat together buttermilk, milk, eggs, and melted butter.  Keep the two mixtures separate until you are ready to cook.
  3. Using a brush or paper towel, spread a good amount of canola oil over griddle.
  4. Heat griddle to 300 – 350 degrees or medium to medium high heat.
  5. Pour the wet mixture into the dry mixture, using a wooden spoon to blend.  Stir until it’s just blended together.  Do not over stir!
  6. Pour or scoop the batter onto the griddle using a 1/3 cup or 1/2 cup measuring cup, depending on how big you want them.  If they are too big, the middle won’t cook through.
  7. Brown on both sides.  I oiled the griddle between each set of pancakes.
  8.  Serve immediately with melted butter and warm syrup.
  9. Refrigerate or freeze any leftovers.

Recipe from Cook AZ I Do, given to me by my wonderful Aunt Marlene Christner, and originally found on allrecipes.com


Posted in Breakfast, Cabin Recipes, Company, Family Favorites, Recipes, Weekend Meals | Tagged , , , , , , , | 24 Comments

Royal Palms Resort and Spa – Phoenix’s Best Kept Secret

Royal Palms Resort

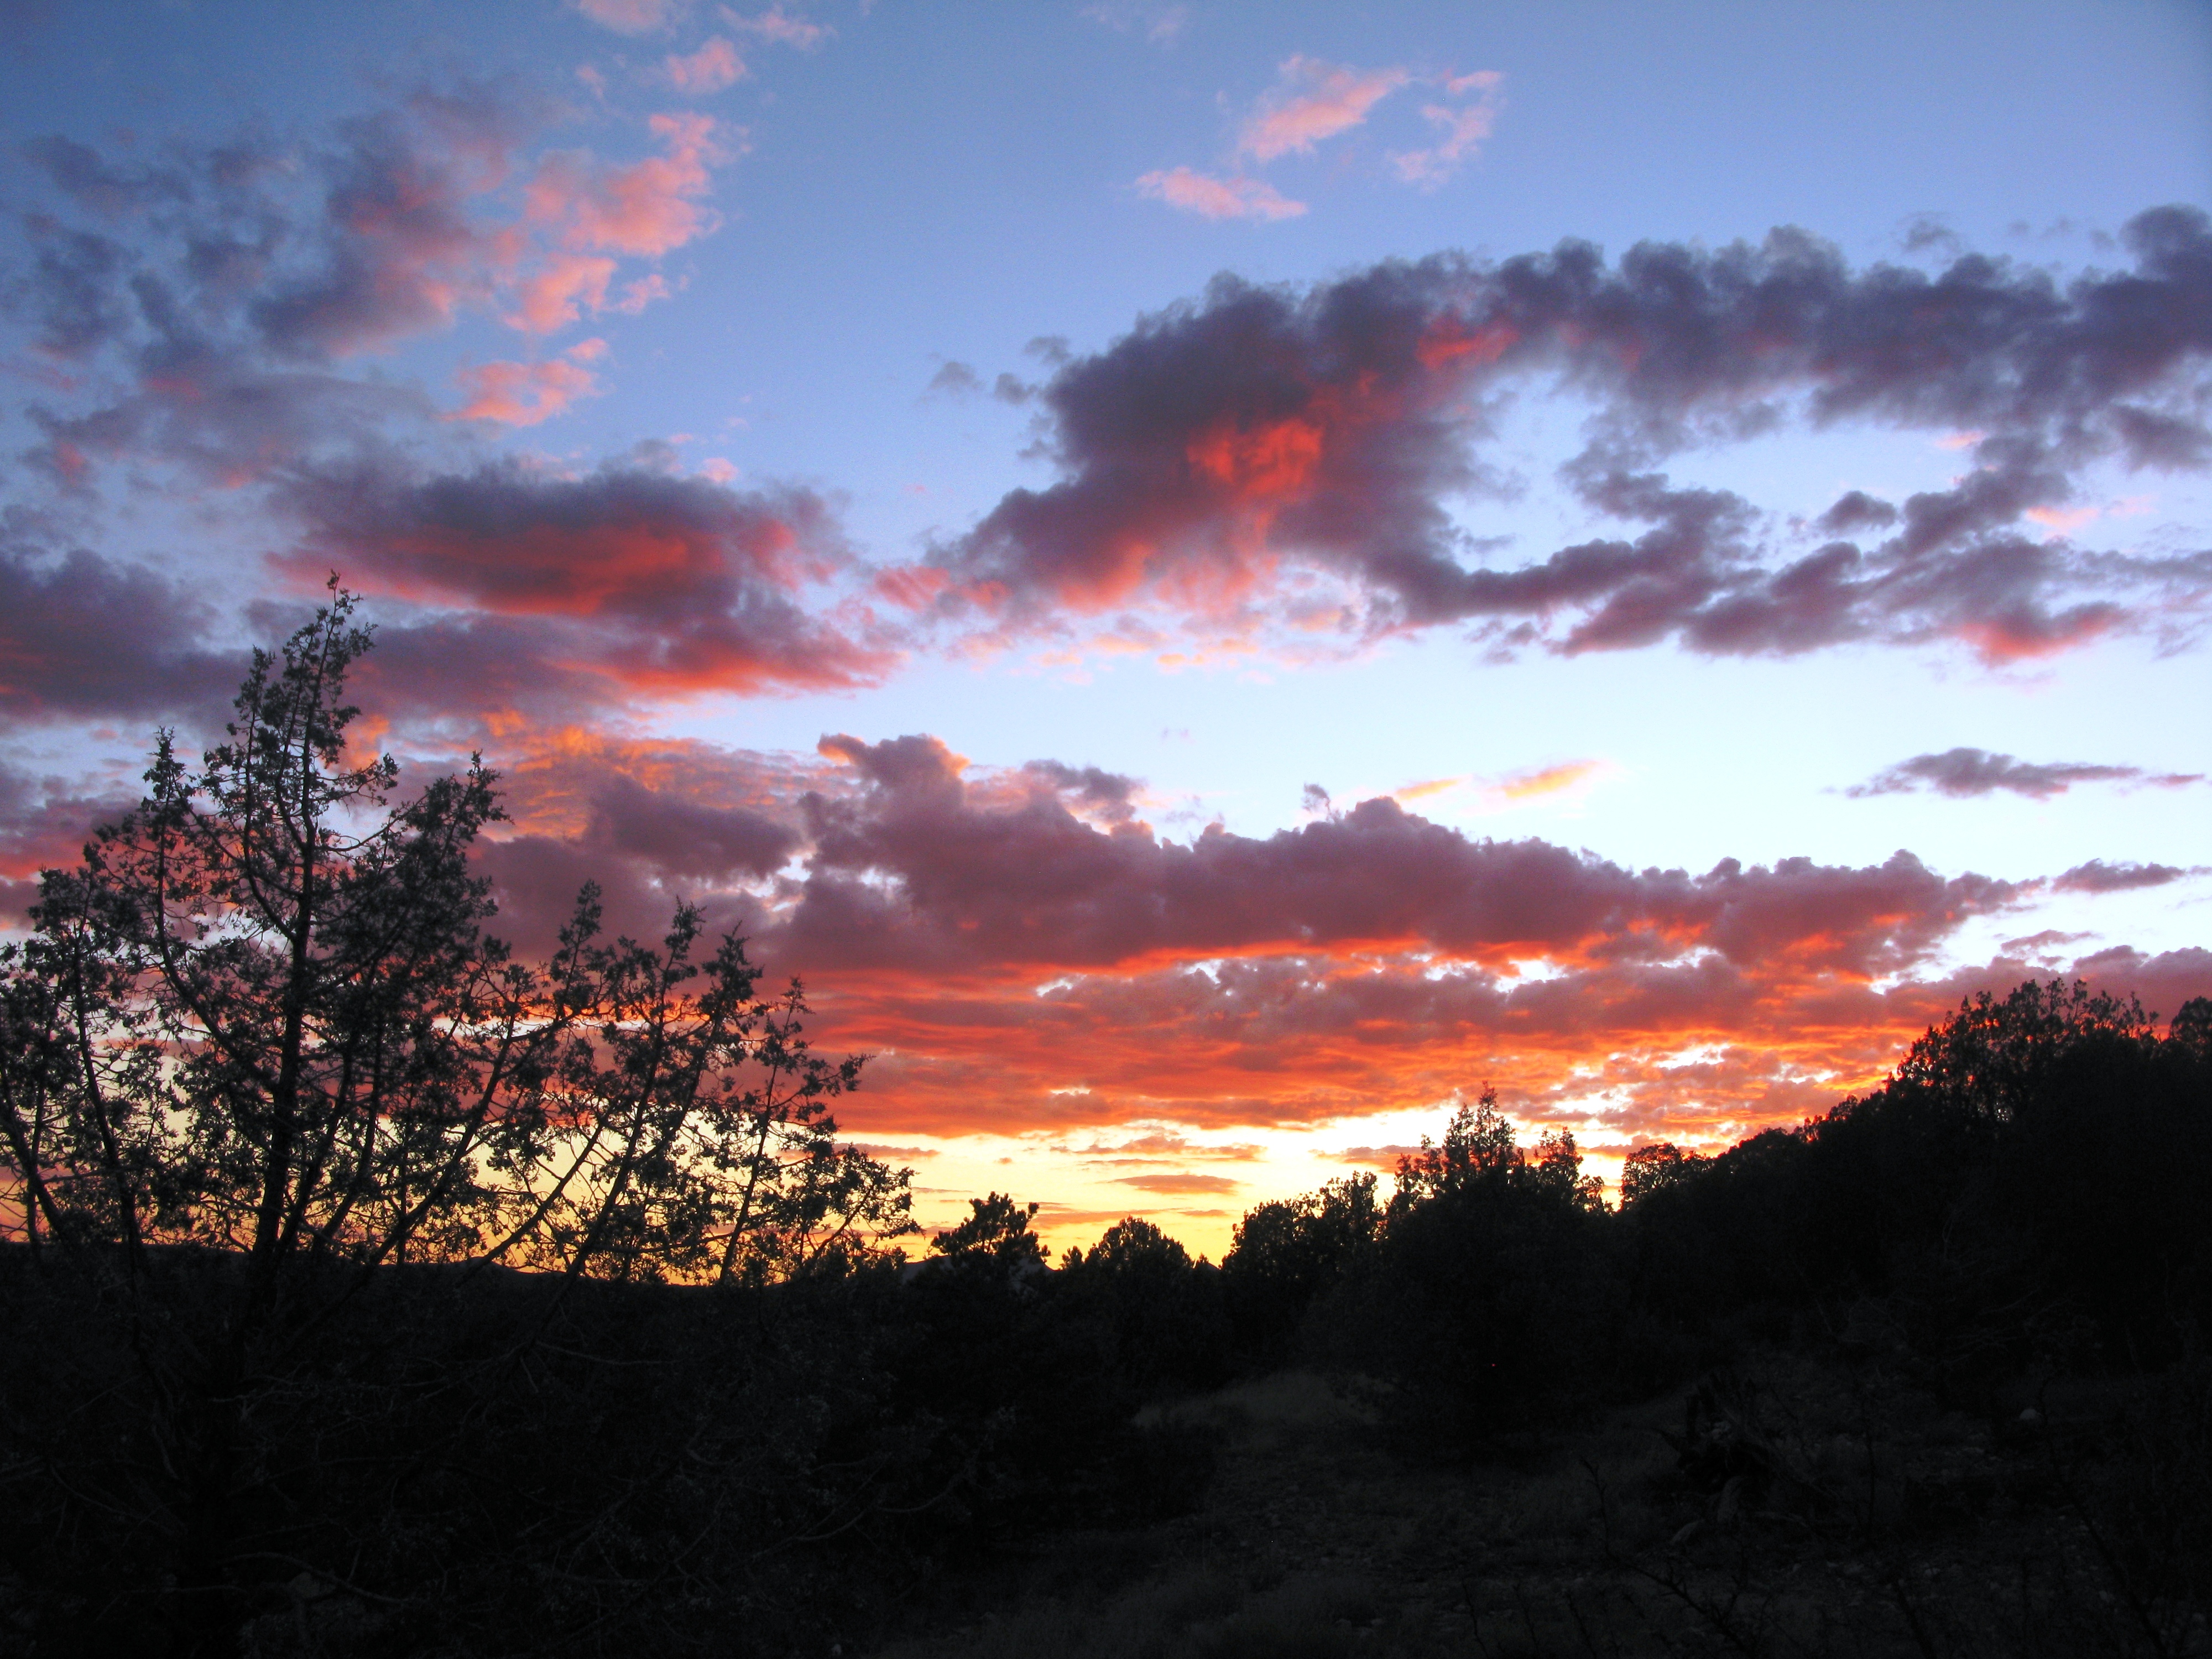
Recently, my husband and I celebrated our anniversary.  He was very sweet and took me to one of my favorite places – The Royal Palms Resort and Spa.  It is located at the base of Camelback Mountain, one of the prettiest areas in Phoenix.  I absolutely love this hotel! There are a lot of nice hotels in the Phoenix area which have fun pools and water slides and are great for a family weekend with the kids, but this destination hotel is more for a quiet, relaxing get-away which was just what we were wanting.

As you go through the gates, you are greeted by a brick driveway lined with palm trees. You feel as if you are entering something special, and you are.

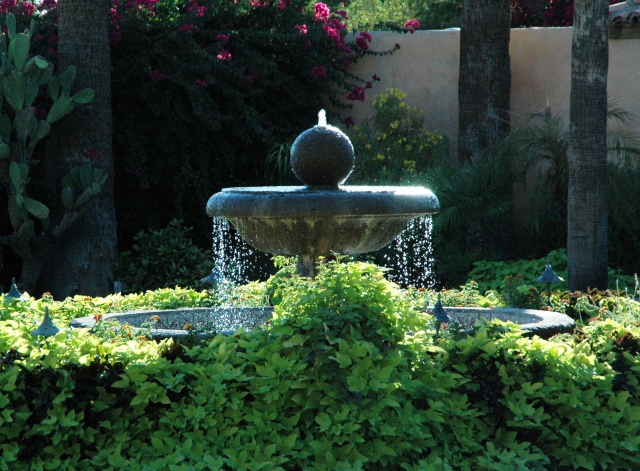
The hotel dates back to 1929 and is a combination of Spanish Colonial, Mediterranean, and Southwestern architecture and decor. The first thing you see as  you walk through the entryway is a beautiful courtyard , common in the Spanish Colonial style.  In the middle of this inviting area is a fountain surrounded at its base by colorful tiles.

Royal Palms Resort

In fact, there are fountains of all shapes and sizes hidden in every nook and cranny throughout the grounds.

Royal Palms Resort

Royal Palms Resort

Royal Palms Resort

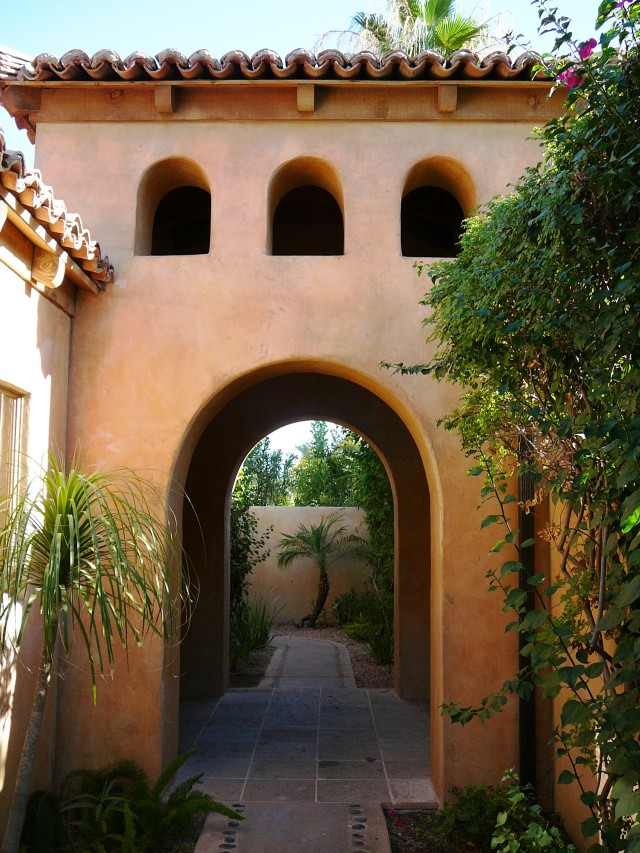
Everywhere you look there are arches,

Royal Palms Resort

wooden doors and shutters,

Royal Palms 30th Anniversary Weekend (25)autocorrectlightand colorcropped

Royal Palms Resort and Spa

metal fixtures,

Royal Palms Resort

and art.

Royal Palms Resort

Plants and flowers line the walkways that wind all over the property.

Royal Palms Resort

I am amazed at how green and lush the grounds look at this time of year.

Royal Palms Resort

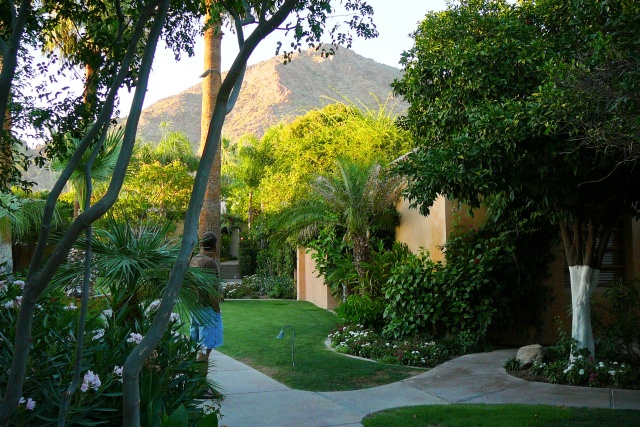
Everything is dead in my yard right now due to the heat.  I need to talk to their gardener!

Royal Palms 30th Anniversary Weekend (24)cropped

There are lots of places to sit, relax, and enjoy your surroundings.

Royal Palms Resort

Royal Palms Resort

Royal Palms Resort

The buildings themselves make you feel like you have gone back in time, and have happened upon an old Spanish mission.

Royal Palms Resort

2007 06 21 jask at royal palms 016autocorrectsaturation

But don’t let that fool you.  They are known for their amenities including a spa with all different types of massages, facials, and body therapies which can be enjoyed indoors or out, depending on the time of year.

Royal Palms Resort

There is also a beautiful pool, not too big, and not too small with a choice of lounge chairs or your own shaded casita if the sun is too strong.  Food and drinks can be ordered to eat poolside from the friendly staff.

Royal Palms Resort

There are all different types of rooms available and the styles are in keeping with the feel of the resort.

Royal Palms Resort

I loved that they had a Keurig in our room, tucked away in an armoir.

Royal Palms Resort

And all the while, Camelback Mountain is standing strong in the background, adding to the atmosphere of the place.

Royal Palms Resort

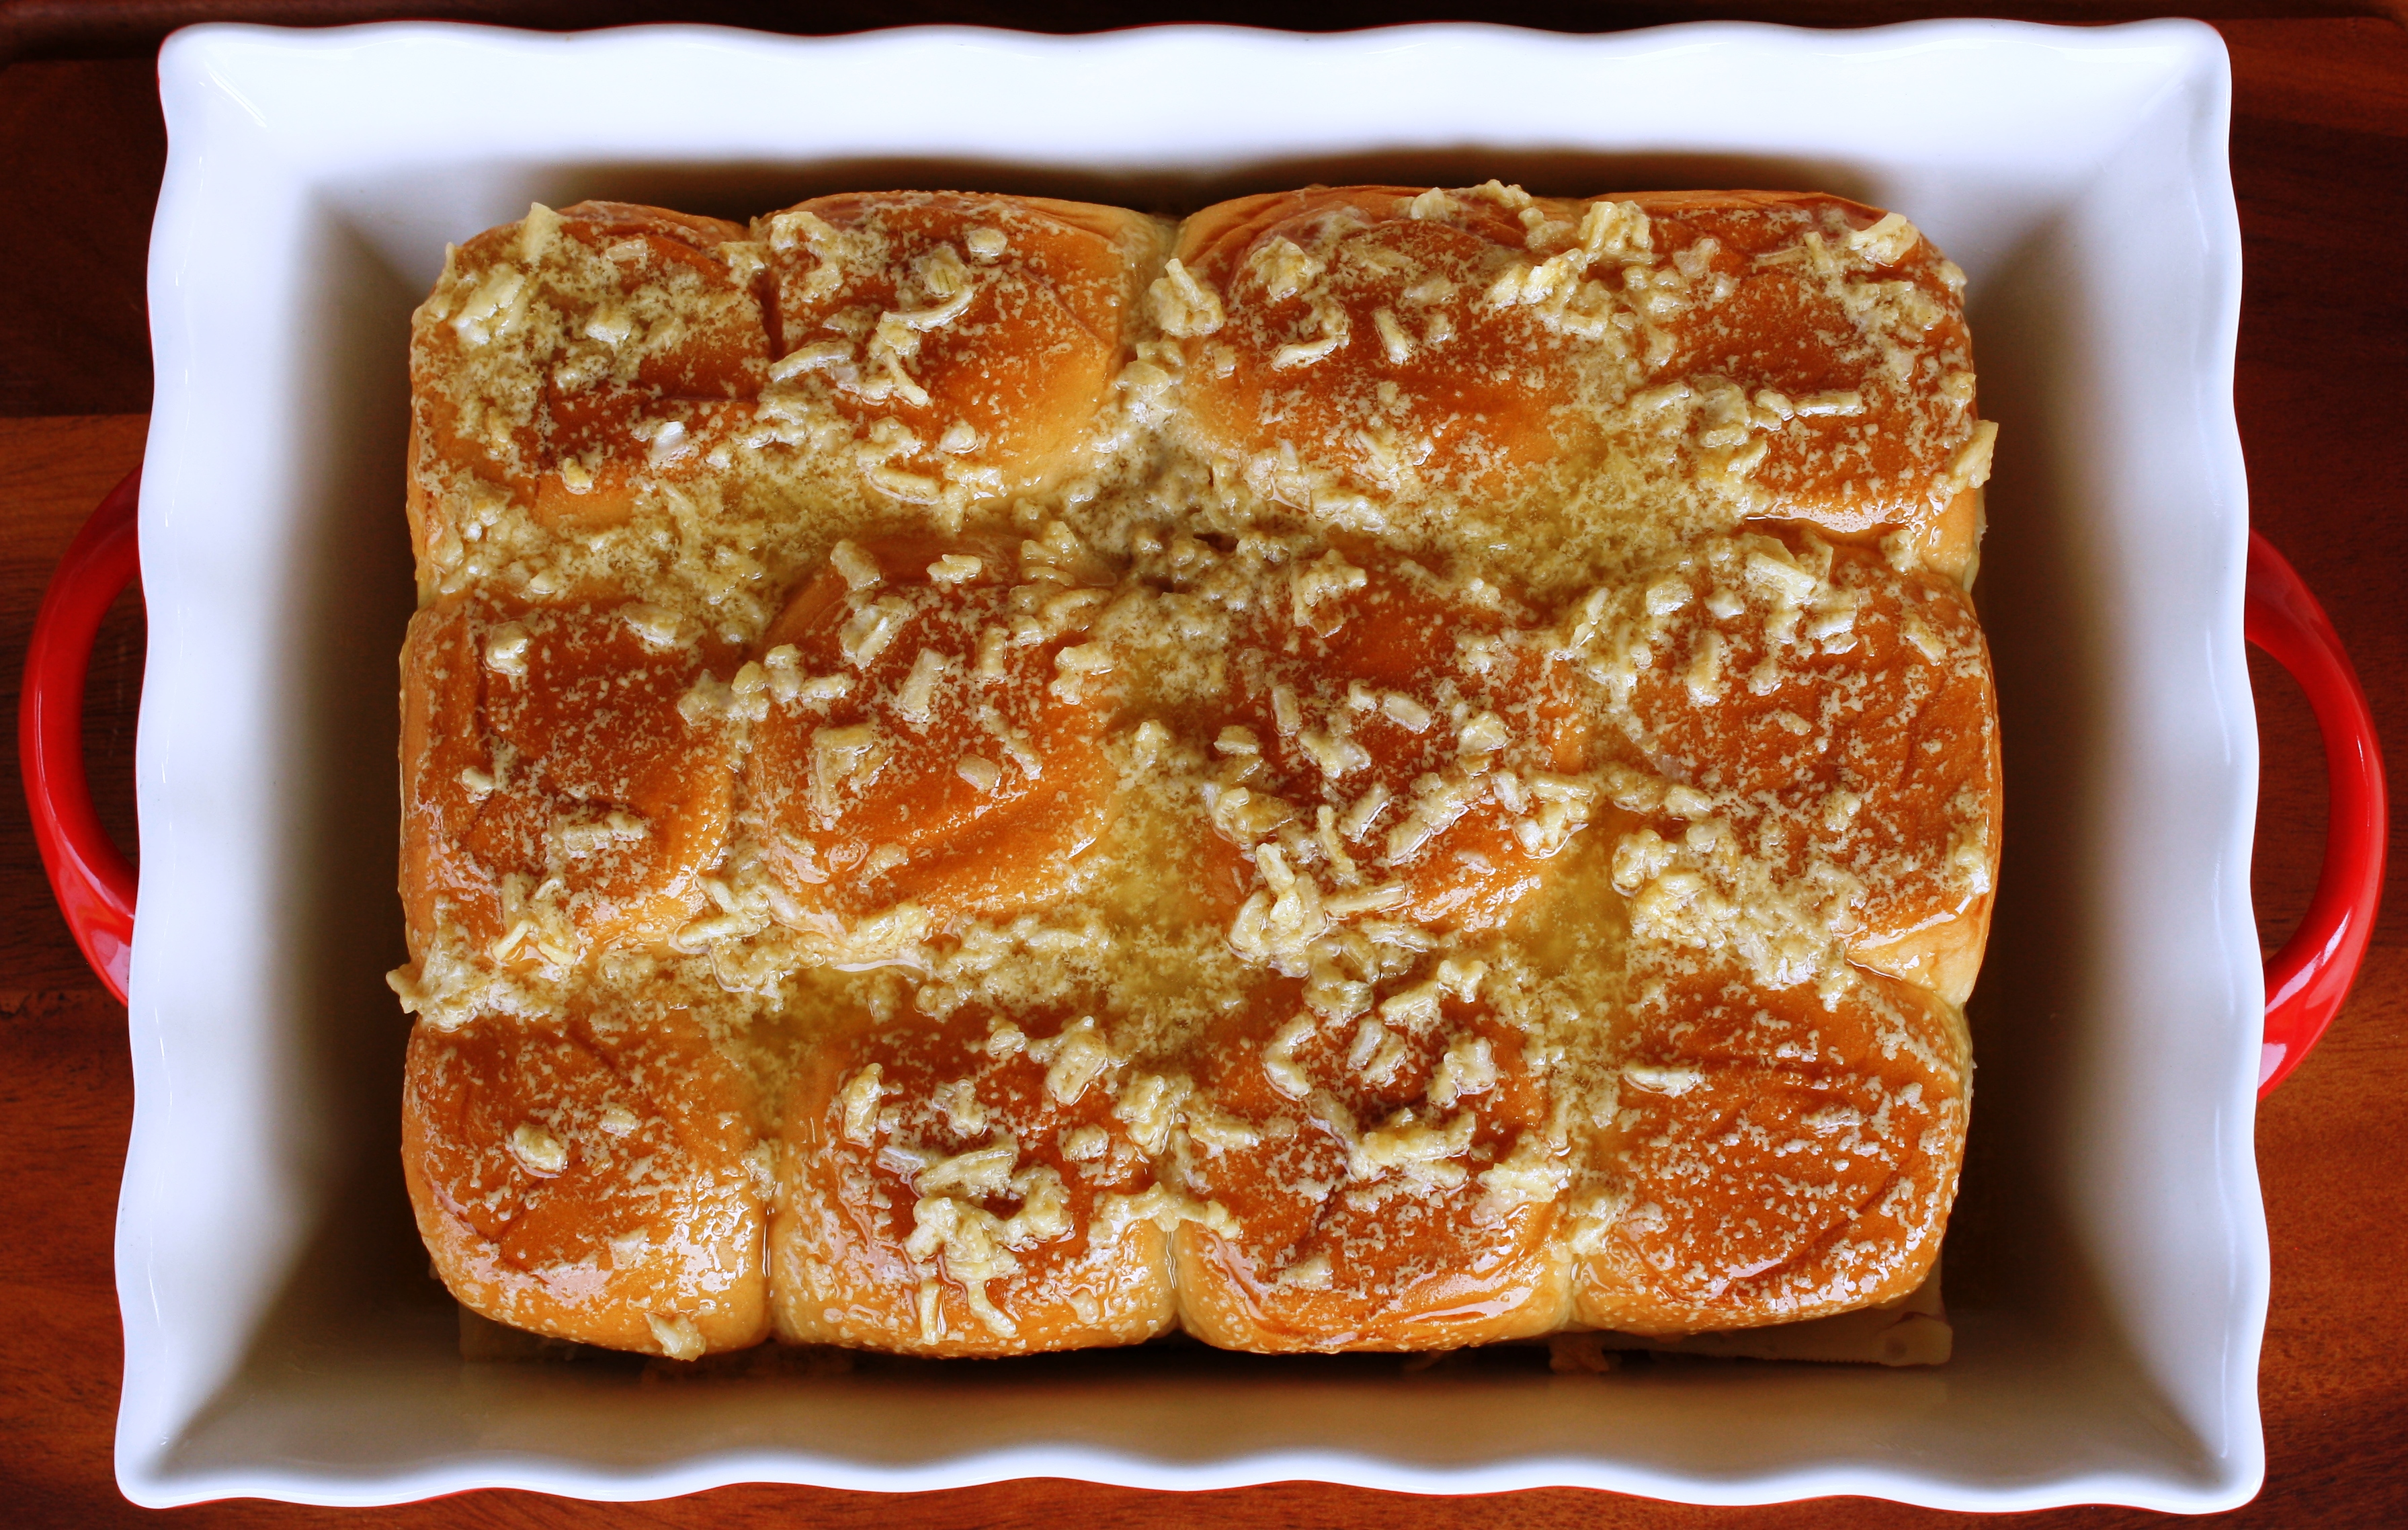
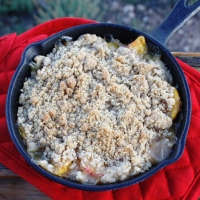
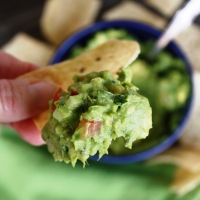
There is even a nationally acclaimed restaurant (T. Cooks) on the property so you never have to leave the serenity of your stay unless you want to.  They are known for using seasonal and local ingredients in their creative dishes.  We told them about our anniversary so they put rose petals on our table, and gave us a yummy dessert that I am still dreaming about!

Royal Palms Resort

I have only just begun to show you all there is to offer at the Royal Palms.  I feel like the rude neighbor who keeps going on and on showing his vacation pictures as you fall asleep on the couch! I just really love this place and wanted to let you know about it.  I will stop there, but if you want to experience the most relaxing and beautiful weekend of your life or just find out more about the resort, click on the link below.

Royal Palms Resort and Spa

5200 E Camelback Rd.

Phoenix, AZ 85018

(602) 840-3610

Special thanks to my dad for letting me use some of his pictures from his stay with my mom for their 50th anniversary.


Posted in Hotel Reviews, Things to Do in Arizona | Tagged , , , , , , , | 22 Comments

Melt in Your Mouth Cuban Sliders

Cuban SlidersI don’t know if I’ve ever mentioned before how recipes are chosen for making and reviewing for Cook AZ I Do.  It is a very random scientific and emotional mathematical process how recipes come to be presented on this blog.  So I thought today I would let you know how sporadically carefully and haphazardly logically they come about. Actually, now that I think about it, the formula for the way they are chosen is whatever I am craving that week too complex and complicated to explain here so you will just have to trust me that it is all a thoroughly researched and important process.  🙂 Seriously though, I really just make the foods I have seen and can’t get out of my mind or can’t stop thinking about.  It may seem silly, but it makes cooking fun, and I always look forward to getting into my kitchen to try a new recipe.  This one definitely falls into the category of not being able to stop thinking about it until I made it.  Although now I can’t get these sandwiches out of my mind because I want more.  They were so good!

Cuban Sliders

Basically they are a hot ham, swiss cheese, and dill pickle sandwich, but what makes them so yummy is the buttery Dijon sauce you pour over them before baking.  And, they are made with Hawaiian Rolls that have a hint of sweetness to them which adds to the combination of flavors.

Cuban Sliders

They are so simple to make.  First you slice the entire bag of rolls in half horizontally and place the bottom layer in a pan.

Cuban Sliders Then layer thin sliced ham over the bottom layer of bread.

Cuban Sliders

Next, layer swiss cheese on top of the ham and dill pickle slices on top of the cheese.

Cuban Sliders

Then place the top half of the rolls on top of the pickles.

Cuban Sliders

Lastly, pour the sauce over the rolls and cover with foil.

205 06 30 Cuban Sliders (61)autocorrectcropped

Bake in the oven for a short time, and you have melt in your mouth sandwiches, perfect for a quick lunch or a summer get-together.  If you are having a party and want to make them ahead of time, just put the sandwiches together, make the sauce, wrap both with plastic wrap, and keep in the refrigerator.  When you are ready to serve them, all you have to do is pour the sauce over the sandwiches, and bake.  Once baked, the onion flakes in the sauce become a little crispy and taste a little bit like french fried onion rings.

Cuban Sliders

Everything in these sandwiches works together to make this one of the best sliders I’ve had.  My husband took the leftovers to work today, and he said they heated up well and tasted just as good as when they were freshly baked.  The next time you get tired of the same old sandwiches for lunch or need a new idea for a casual summer get-together, give these a try.  Then you’ll see what I mean about not being able to get a recipe out of your head! 🙂

Cuban Sliders

  • Servings: 12
  • Difficulty: easy
  • Print

  • 12 pack of Hawaiian Rolls
  • 1 pound of thinly sliced ham lunch meat
  • 1 package of Swiss cheese slices (you will need 8 slices)
  • 1 jar of Clausen dill pickle sandwich slices (you will need 6 slices)
  • 2 Tbsp. dried minced onion
  • 1 stick of melted butter (1/2 cup)
  • 1 Tbsp. Dijon mustard
  1. Preheat oven to 325 degrees.
  2. Grease an 8×12-inch pan (9×13-inch would also work) with butter.
  3. Without separating them, slice the entire package of Hawaiian rolls horizontally in half.
  4. Place the bottom half in buttered pan, cut side up.
  5. Layer ham slices on top of the cut rolls.
  6. Place Swiss cheese slices on top of the ham.
  7. Cut each pickle slice in half.  Place one half pickle slice on each slider.
  8. Cover with Hawaiian roll tops.
  9. Make sauce by whisking together melted butter and Dijon mustard.  Add in the minced onion and stir.
  10. Spoon the sauce over the roll tops.
  11. Cover pan with foil.
  12.  Bake for 15 minutes.  Remove foil and continue to bake for an additional 5 to 10 minutes or until the rolls are just beginning to get a little brown on top.  Watch carefully at the end so they don’t burn.
  13. Remove the sliders to a cutting board with a spatula and cut into 12 pieces. Serve immediately.
  14. Refrigerate any leftovers.

Recipe from Cook AZ I Do, slightly adapted from a recipe found on House of Yumm


Posted in Cabin Recipes, Company, Lunch, Party Recipes, Recipes, Summer Recipes, Weeknight Meals | Tagged , , , , , , | 24 Comments